Set Up the Workflow Rule Email Drip
Note: Since filming this video, there have been some UI changes made to Workflow Rule setup. If you need to create a workflow rule that triggers on field update, select EDIT > SPECIFIC FIELD > [Desired Field]
The key here is to create a new workflow rule based on a ‘Field update’, using the “Status” field.
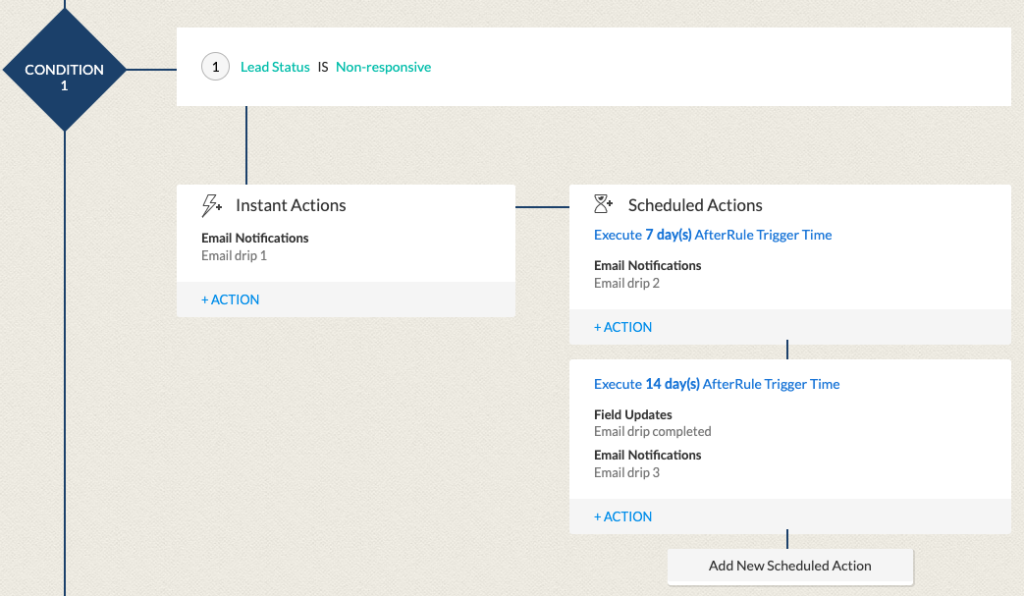
We want to send an immediate email and two scheduled ones. Use the email notifications you created earlier. Then, at the same time the last email is sent out, create a field update to change the “Email Drip Status” to ‘Completed’.
The reason we don’t set up the email drip in the blueprint builder itself is that you cannot create scheduled automations in a blueprint. That is why we tie this email drip in using a workflow rule.
Also note that if someone changes “Status” halfway through the email drip, they will be taken off it. If they no longer fulfill the conditions for the rule, the scheduled automations no longer apply.
Thus, the “Email Drip Status” field filters Leads into 3 groups: those that never started the email drip (empty), those started and then began talks with a salesperson partway through (‘Started’) and those that completed the drip (‘Completed’).

This is what the email drip should look like. Remember, we already updated the “Email Drip Status” to ‘Started’ inside of our blueprint.
